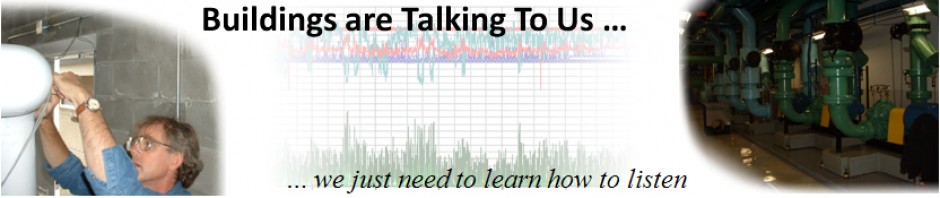
In the past, I have discussed the topic of aliasing; i.e. how looking at trend data where the sampling rate is to slow to capture what is really going on can mislead you.
Yesterday, in the course of a class discussion about loop tuning, one of the attendees offered to use one of the control loops in their facility for a science experiment so we could try tuning the loop in real time. The loop appeared to be fairly stable, as illustrated below …

… but was not at set point, which is what a proportional only control loop might look like due to the proportional error that is inherent in a proportional only control process.[i]
Specifically, the loop set point was 62.5°F, but the trend line indicated that it was running in the 58°F range, which implied the proportional error was in the range of 4.5°F. But it turned out that we were being fooled by aliasing and I thought I would share some of what we learned and observed in this blog post.
Contents
The links below will jump you around in the blog post. The Return to Contents link at the end of each section will bring you back here.
The Typical PID Loop Response Pattern
The classic signature of a well tuned PI or PID control process is a waveform that is sometimes referred to as a “quarter decay ratio”, as illustrated below.

To discover if your process displays this type of response, you need to upset it, which can be done in any number of ways, the most common being to change the set point and observe the result. [ii]
Depending on the specifics of the process, the time frame associated with the first few cycles of the wave form usually will be in terms of minutes or possibly, seconds. That means that if you want to observe it, then you need to be sampling the process at least twice as fast as the frequency of disturbance, which is something that Mr. Nyquist identified for us.
Often, this means sampling data several times a minute, perhaps even as fast as every 5 seconds. or less. For some commercial building control systems, this is quite possible, especially if you are not creating a lot of network traffic by archiving the trend data. But for many systems, especially legacy control systems with relatively slow network speeds, this can be challenging or even impossible because the high traffic rates created will slow down or even crash the network.
This is an example of a situation where a data logger can be quite helpful because most current technology data loggers can sample at rates as fast as once a second, sometimes even faster as illustrated in the screenshot below where I am setting up an Onset MX 1101 Bluetooth logger.

This is also one of the reasons why pre-DDC pneumatic PID controllers typically included a chart recorder as shown in this picture of a process control room taken in the early 1940’s.[iii]

In addition to documenting the operation of the process over time, the chart recorder allowed the operating team to observe the response of the control process in real time when they were tuning the control loops.
[Return to Contents]
Taking a Closer Look at Our Control Loop
If you look closely at the window with the PID logic block in it in the previous illustration, you will notice that it says the input to the process is 61.2°F, not the 58°F ish value shown by the yellow trend line.

That is a clue that aliasing is going on. In other words, the logic block window says that it knows something we don’t know via our observation of the trend graph,.
When I noticed this, I asked our brave volunteer, to see what the sampling rate was for the trend.
It turned out that it was once every thirty minutes. So the evidence now suggested that even though at the 30 minute point, the input value might be in the range of 58°F or so, in between those points in time, the value was somewhat different; 61.2°F for instance at the time we opened up the logic block window.
Notice also that the loop has integral gain applied to it. That means that it is not a proportional only loop.
In turn, that means the apparent difference between the set point and control point can not be attributed to proportional error given that the whole point if the integral function is to eliminate proportional error. This was another clue that there as “more going on than met the eye” when viewing the trend graph.
[Return to Contents]
“Sampling Rate” and “Too Fast” are Mutually Exclusive Terms
The line above is one of my loop tuning and trend analysis rules of thumb because frequently, when you are doing diagnostics and commissioning, one of the reasons you are looking at trend data is to figure out what is going on and one of the things that could be going on is that the control processes are unstable. But since you have no idea what the frequency of the disturbance might be – if it exists – you can’t really apply the Nyquist Theorem.
My “default” sampling rate for trend analysis is once a minute because it can be handled by most systems with out crashing the network if you use it judiciously, perhaps by applying it to one or two systems at a time. And while it may not be fast enough to fully capture the issue at hand (for instance, something with a cycle time of once every two minutes or less), it will probably pick up some a measure of that kind of instability and having observed that, I can either elect to increase the sampling frequency if possible or deploy a data logger.
But for loop tuning, you really do need an accurate picture of the wave form, especially if you are going to use the open loop method.[iv] So I typically try to use a sampling rate in the 1-5 second range if possible if I am tuning a control loop.
[Return to Contents]
Increasing our Sampling Rate
In this instance the system was in fact capable of a 5 second or better sampling frequency. Since we were planning to tune the loop eventually, and since that same fast sampling frequency might reveal what was actually going on in between the 30 minute data points, our brave volunteer went ahead and set the trend to use a 5 second sample rate.[v] Here is what that revealed.

This is quite different from the impression we would have had if we had retained the 30 minute sampling rate as shown below.

At the time we increased the sampling rate, our brave volunteer had already made some tweaks to the loop tuning parameters based on what he heard me saying in class.
So the pattern you are seeing above reflects the system’s reaction to those changes and is not representative of the pattern in the chart at the beginning of the post where the temperature seemed to be floating around 58-59°F.
Fear not, we actually put the system back to the way it was and captured that data. I will share that in just a bit. But first, I wanted to show you a couple of other things that we observed.
In making his initial adjustments, we eliminated the integral gain and tweaked the proportional band to see if we could identify the natural frequency[vi] of the control process, which is the first step in the closed loop tuning technique. Thus, proportional error should be “back in the picture” and trends at both sampling rates suggest there is proportional error.
But the 30 minute sample would lead you to think that you had not found the natural frequency of the system [vi], while the 5 second sampling rate reveals that the system is oscillating.
[Return to Contents]
I Feel the Need for Speed Patience
If you look at the wave form that is starting to emerge IN THE FIRST TWENTY-FIVE MINUTES of our test, you will notice that it is not a consistent pattern.

The reason for the capital letters above is that I wanted to emphasize that when you are doing this, it takes time. You have to allow the system sufficient time to establish a pattern (or not). For some processes, this can be a matter of a minute or two or even seconds. But for many of our systems, it is more often a matter of 5-10 minutes or more.
If you make a change based on what you think is probably going to happen rather than waiting to find out if you are right in your assumption, then you may end up wasting time and/or having things really un-wind on you as a result of zigging when you should have zagged.
[Return to Contents]
HVAC Systems are Highly Interactive
A pattern that is not consistent in the context of it’s frequency and the shape of the wave form may mean that you need to allow more time for the system to stabilize. But it can also mean that the control process you are looking at is;
- Interacting with other control processes.
- Reacting to some sort of upset, like a set point change.
So, we decided to check to see if there were other control loops running in the system in question while we waited for the process to settle into a consistent pattern (or not) and found that:
- The system had a control loop that might modulate the outdoor air and return air damper under some conditions and also
- A control loop that would modulate fan speed.
Changes in any of these processes can (probably will) have an impact on the others.
For instance, if the outdoor air and return air dampers move, the pressure drop through them will likely change. This will shift the fan operating point and cause the fan speed control process to change the fan speed. Both of these interactions will likely impact the flow through the cooling coil, causing its leaving air temperature to change.
The leaving air temperature change will eventually affect the zone control processes (the system was a Variable Air Volume (VAV) reheat system) and cause the terminal units to move their dampers, which will affect the flow rate and duct static pressure and cause the fan speed control process to react.
Etc, etc, etc.; you get the idea.
In a way, its kind of amazing that we can get these systems to work at all (you can, that is part of the challenge and fun). And its probably not at all surprising that there are a few issues to be dealt with.
In any case, as the result of our discovery, we decided to eliminate the interactions temporarily by locking the other control processes down to a fixed output value.
[Return to Contents]
A Few Precautions
Locking down a potentially interactive control process has been a valuable troubleshooting technique over the course of my career. If you do it and the problem disappears, then you likely found the root cause and can focus your attention on that, as in this example.

But if the pattern changes persists, then it is likely that some other process is driving the dysfunction and the one you locked down was reacting to it (and in doing that, contributing to the dysfunction). but was not the root cause.
But you need to be careful when you do this.
The System May Be Serving Something Mission Critical
Before you do this, you need to ask yourself what will happen to the load being served if something goes wrong relative to what is happening currently. If there could be major problems, you may want to wait to try troubleshooting on a day where the impact will be less severe.
Or, if you really need to do something, then you may want to “sneak up” on disabling the process by gradually limiting its impact rather than completely shutting it down.
You May Not Want to Totally Eliminate the Process
Our goal here is to stabilize the other processes. Eliminating processes one by one will do that. But you can also lock them down at some intermediate condition.
For example, if we suspected that a preheat coil control process had gone unstable and was driving the other processes into instability, but it is below freezing outside, then totally shutting down the preheat process would be a really bad plan.
But you could “eyeball average” an output state that would provide a tolerable (above freezing) leaving condition from the preheat process and lock the process output down at a condition that would deliver a safe leaving air temperature for the time being.
You would want to combine this with careful observation of the preheat leaving condition to make sure your fixed output was delivering the intended result (a temperature leaving the preheat process that was above freezing in addition to being stable) while you also observed the result of your change in the operating pattern produced in the other control processes in the system.
Remember to Release Your Over-ride At the Conclusion of Your Test
Its very easy to walk away from a test and forget to release the manual over-ride that you put in place.
Don’t do that.
It could – probably will – come back to haunt you in the form of wasted energy or worse yet, a frozen coil or a ruptured duct.
[Return to Contents]
Eliminating Interactions in Our Experiment
For the system we were considering, at the time of our science experiment, the team was comfortable with totally locking out the other control processes given what was going on in the facility. So we did just that and that is what caused the “burble” (a technical term for “weird bump”) in the data stream at about 1:20 PM.

Presentation Makes a Difference
Ryan Stroupe, the person I work with for the classes at the Pacific Energy Center, introduced me to the works of Edward Tufty, who is brilliant in terms of showing us how to present data in meaningful ways. One example of this is the scaling of an axis.
Problems Can Be Hidden by the Axis Scale
The chart below presents the AHU leaving air temperature data for our focus system for the period of time that we worked with it and for several hours there-after with the Y axis scaled so that it is just slightly wider than the wave form.

Viewing the data at this scale allows us to clearly see that in the context of a temperature control process, there is a problem in the form of a lack of stability and in the form of a significant deviation from the desired set point
The chart below presents the same data but with the Y axis set to a much broader scale, a scale that might be invoked if data from multiple sensors was being displayed where a second data stream needed the broader range to be fully displayed. For this example, I have scaled the axis so that flow data (if it existed for the system) with a range of 0-2000 cfm could be displayed on the same axis as the temperature data.

Note how the temperature data, which in reality shows significant instability and deviation from set point if you look at it in the first chart, appears to be fairly stable when presented on a chart with the Y axis scaled for a much broader range.[vii]
I realize that it would be possible to place the flow data on a second axis, or even a third axis, which would allow the temperature axis to be scaled in a meaningful way relative to the temperature data. But many control systems would not present the data that way; rather they would scale the axis for the trend group to allow the parameter with the biggest range to be displayed, which will tend to flatten out the data from a sensor with a smaller data range.
Problems Can Be Over-stated by the Axis Scale
The chart below is from the same data set but with the time axis focused on a 15 minute window and the temperature axis set for a span of 1.5°F.

If you looked at it with out duly noting the span of the Y axis, you could interpret it as showing major instability in the discharge temperature when in fact, for this portion of the data set, the temperature was only moving around a bit over half of a degree at a frequency of about 9 minutes per cycle.
The bottom line is that you can easily loose sight of the axis scale when you are troubleshooting in real time because your attention is grabbed by the shape of the wave form. And as a result, a data stream that is actually quite unstable can be mistaken for a stable data stream and (erroneously) eliminated from consideration in the troubleshooting process or vice versa.
[Return to Contents]
Identifying the Natural Frequency for the Control Process
The chart below reflects the full data set for for the period of our science experiment with the three points where we made an adjustment to the system highlighted.

The period of time prior to the yellow band represents the system’s reaction to the initial adjustments the team made to try to find the natural frequency for the process, which as I mentioned is the first step in the closed loop tuning method.
The yellow band is the point in time when we locked down the other interactive control processes in the system to allow us to focus on the discharge temperature loop that was in charge of the chilled water valve. After we did that, the system appeared to settle into a steady oscillation with a period of about 9 minutes and with a consistent magnitude for the peaks and valleys. The image below focuses on this area of the chart.

This oscillation likely represents the natural frequency of the system. Ideally, we would have watched the process for several more cycles (meaning another 20-30 minutes) to make sure that the pattern was consistent. But to make better use of the class time, we assumed that we had identified the natural frequency and moved on to our next experiment, which I will discuss in a minute.
But before doing that, I wanted to point out that if we were in fact correct about having identified the natural frequency of the system, then if we would have narrowed the throttling range a bit more (a.k.a. narrowed the proportional band or increased the gain or made the system more sensitive), the system would have become totally unstable. In other words, the peaks and valleys would become larger and larger with each cycle.
In contrast, if we had opened up the throttling range (a.k.a. opened up the proportional band or reduced the gain or made the system less sensitive), then the oscillations would have flattened out and the system likely would have stabilized with a proportional error in the range of 4-6°F. In other words, the process would have become stable/flat lined at about 68- 70°F with a set point of 64°F.
[Return to Contents]
Restoring the “As Found” Tuning Parameters and Observing the Results
The next step in the tuning process would have been to begin to add integral gain to the loop to eliminate the proportional error, which would typically involve increasing the proportional band so that adding the integral gain did not push you into unstable operation. The natural frequency of the system can be used to estimate first pass tuning parameters and the resources I mention in footnotes [i] and [iv] describe how to do that in detail.
But rather than do that, for our exercise, we decided to restore the “as found” tuning parameters to the loop. Prior to this point in time, the operating team was under the impression that the loop had been tune by the control vendor. After all, it seemed to be stable and there was integral gain provided in the logic block settings.

But it did not seem to be holding set point; i.e. there always appeared to be proportional error, which, in theory, should not exist if the integral gain had been properly adjusted.
When the team asked their vendor about this and how they had arrived at the loop tuning parameters, the vendor said that they had used the metrics recommended by the factory for systems of this type rather than using a more formal, rigorous approach and that they felt comfortable with things because the loop was stable.
But given what we were seeing, we had started to wonder if that was really the case. In other words, could the loop only have appeared to be stable because of the 30 minute sampling rate? And could the sampling rate also explain why an apparently stable PI loop exhibited proportional error?
If the loop really was well tuned with the recommended factory settings, then it should exhibit stability and no proportional error at the faster sampling time we now had in place. But, as you an see from the images shared previously and reproduced below, that was not at all the case.

Note that the red band is the point in time when we restored the original tuning parameters. The orange band is when we allowed the other control processes to run and interact with the chilled water valve control process.
Clearly the loop was not well tuned and needed some attention.
That is where the operating team plans to go next, so hopefully, I will have some additional data to share with you to show the results. But to finish up this post, I thought I would manipulate the data set illustrated above to show how and why the 30 minute sampling rate gave the wrong impression about what is actually going on.
[Return to Contents]
Sampling the Five Second Data at Thirty Minute Intervals
By applying filters, I was able to take the 5 second data set and pull out data points to represent what we would have seen at the original sampling rate of 30 minutes. Here is the result of that effort compared to the actual data stream and the points we upset the system.

Here is what it would look like if the other data was not visible.

And here is what it would look like if the format was similar to the format used by the control system we were playing with.

This next chart is very busy, but my point in presenting it is to show how variable the wave form can be from reality if you are being aliased because your trend sampling rate is too slow.

What I am hoping you can see from that progression is:
- How the aliasing associated with a sampling rate that is too slow compared to the disturbance you are trying to capture will tend to change the frequency, flatten out the disturbance, and otherwise distort the wave form, and
- How the scaling of the axis can further flatten out the waveform and understate the significance of the disturbance.
[Return to Contents]
Sampling the Data at the Frequency of the Disturbance
If you were to sample the process at a rate that was very near to or the same as the frequency of the disturbance, a very interesting (and misleading) thing happens.

Note how the trend line flattens out on the timeline once we are past the point of the last upset we created and the system has settled into a fairly steady state oscillation. A similar thing happens if you sample at even multiples of the frequency of the disturbance.

And the point in time when you initiate the trend sampling also has an impact.

This image illustrates why these things happen.

As you can see, once the steady state wave form is established (around about 2:35 PM) if a data sample is taken at a frequency that matches or nearly matches the frequency of the wave form, then the data that is read will be read at the same point in the cycle, thus at the same value. This will create the illusion of a straight line.
Shifting the point in time when the sample is taken moves the point that is sampled up or down the wave form. Thus, if the sampling is initiated at or near the time when the wave form is passing through set point, then the result will look like a fairly straight line/stable pattern that floats around the set point.
The reason the line drawn by the aliased data does not end up perfectly straight is that there are minor differences in the frequency of the wave form from wave to wave. In this particular instance, the cycle time varied from 12 minutes and 45 seconds to 13 minutes and 10 seconds.
I know of at least one instance where a some what clever, but perhaps also, somewhat unscrupulous control system technician realized all of this and used it to resolve loop tuning issues flagged by a commissioning provider on a new construction project.
In other words, rather than actually tuning the loops, they set the sampling rate to match the frequency of the disturbance, triggered the trend so that it was capturing data around the set point, and submitted the results as evidence of having tuned the loops.
Fortunately, the commissioning provider (not me in this particular instance) was even more clever, and was scrupulous in their dedication to representing the Owner, meaning they “were on” to the trick and rejected the proposed solution.
[Return to Contents]
Setting the Sampling Time Based on the Nyquist Theorem
As mentioned previously, the Nyquist Theorem suggests that if the average cycle time for the wave form is in the range of 12.75 minutes, then to capture it we would need to sample the data at twice that speed or faster. That would translate to a sampling rate of 6.625 minutes or faster. The chart below illustrates what happens if we were to sample this data once every 5 minutes and once every minute.

Notice how the 5 minute sampling frequency – which is a bit faster than the Nyquist recommendation – fully captures frequency of the actual wave form. But it does not fully capture it’s shape. That means that if you set the sampling time based on the Nyquist Theorem, you would recognize the problem exists, but may not have a fully accurate picture of it.
Notice also how the waveform associated with the 1 minute sampling frequency is virtually indistinguishable from the actual wave form. This illustrates how a increasing the sampling frequency above the Nyquist suggested minimum will not only capture the frequency of the disturbance, it will also capture an accurate picture of it. The faster you sample, the closer the image created by your sample will match reality.
[Return to Contents]
What’s the Practical Meaning of This?
The folks attending the class were somewhat entranced but dismayed by all of this. One poignant question that was asked was long the lines of:
Practically speaking, is this just an interesting intellectual exercise or does addressing this go to the bottom line?
For me, the discussion was (and always has been) interesting and probably a bit intellectual. But there are also some very practical implications.
For the particular class in question, being a class for directors of engineering, chief engineers, and engineering technicians in the hospitality industry, part of the goal of the class is to teach things that will help the attendees save energy and reduce their carbon foot print. But at the end of the day, their mission is to deliver guest satisfaction.
I can tell you from direct personal experience that an out of tune control loop in a terminal system, or even in a system supporting a terminal system, that causes the temperature in the occupied zone to vary several by several degrees multiple times (or even once) an hour will create guest dissatisfaction. So in the context of the hospitality industry bottom line, identifying and stabilizing an out of tune control process will likely impact your bottom line in the form of happy guests who had a good experience in your facility and therefore, will return.
But if you don’t identify and correct the problem, you will find yourself and your facility as subject of bad reviews in social media and may even end up compensating the guest by waiving their room charges, providing a free meal, etc.
From an energy and carbon stand point, there are likely direct and indirect benefits.
The direct benefits may be difficult to quantify. But it is likely that a process that – for instance – over-cools then under-cools – will be wasting energy and creating unnecessary carbon emissions compared to a stable process, especially if there is a compensating process like reheat that is “stepping in” to compensate for the over-cooling when it happens.
The indirect benefits actually (in my opinion) lend themselves to quantification. More specifically, in the case of our example, we have an observed, but here-to-for, unrecognized control process that is cycling once every 12.75 minutes.
- If the system operates 24/7, that is about 41,224 cycles per year.
- For a system that operates 5,000 hours per year (my observation of the typical number of hours a ball room or meeting room system might operate in a hospitality facility that runs 80% or more occupied most of the time), that is about 23,529 cycles per year.
- For a typical office building operating 3,400 or so hours per year, that is about 16,151 cycles per year.
The design life for actuators like the Belimo product line is in the range of 50,000 – 150,000 cycles. That means that the observed cycle frequency, if unrecognized or unaddressed will likely:
- Result in actuator failures in 1.2 – 3.6 years for systems running 24/7, and
- Result in actuator failures in 2.1 – 6.4 years for systems running approximately 5,000 hours per year, and
- Result in actuator failures in 3.1 – 9.3 years for systems running 3,400 or so hours per year.
Given that:
- The design life for the air handling systems we are discussing will be in the range of 15-30 years or more and that
- If the control process was stable, the actuator life could exceed the system life,
then addressing the hunting control process will represent a non-energy benefit to the facilities bottom line.
More specifically, eliminating an actuator failure eliminates one or more hours of technician time to identify the problem and correct it as well as $200 – $300 or more in hardware cost for the replacement actuator.
But, I would postulate that if you consider this from a holistic perspective, then there is an energy and carbon impact associated with the failed actuator itself. It is reflected in the replacement cost of the actuator and represents the embedded energy and carbon associated with its production.
Thus, if tuning a control loop allows an actuator to last the entire life of the system it serves rather than having to be replace multiple times over the course of the system life, then I would postulate that you have saved energy, carbon and other resources.
[Return to Contents]
Targeting Loops To Tune
Another common question that came up in our discussion was:
Does this mean I need to look at and re-tune all of my control loops? There are hundreds of them!
In the bigger picture, I think the answer to this is along the lines of this.
If you were unaware of the potential for aliasing and the trend rate you are using to assess your control loops is once every 10 to 30 minutes or more, then you probably need to take a look at what is really going on.
This doesn’t mean you should go in and shorten the sampling time of all of your control processes all at once. In fact you probably do not want to do that and should not do it because of all of the data and traffic it will create in your system.
Rather, you should consider taking an organized approach to it. A good starting point is to try to assess how much of a tuning effort has been made already by generating a report that shows what the proportional, integral and derivative gain settings are for all of your loops.
It is not unusual to find that many, or maybe even all of the loops are at the factory default values or that loops for different system and equipment types (VAV terminal units, AHUs, distribution pumps, etc.) have different gains but on a system and equipment type basis, most if not all of the gains are at the factory defaults.
If you take a moment to consider:
- How dynamic and nonlinear HVAC processes and performance curves can be, and
- How variable HVAC systems can be in terms of the size and configuration of the equipment serving them, and
- How dynamic the climate and loads driving the HVAC systems are,
then you can probably reach the conclusion that it is highly unlikely that the tuning solution for each and every loop in a facility will be identical. So you may want to consider focusing on one system at a time to check the loop tuning, perhaps when you are doing preventive maintenance on it.
Or you may want to target systems because;
- You know they are unstable for other reasons like tenant or guest complaints about temperature swings in their zones, or noise, or
- You seem to have a high number of actuator, valve packing failures and valve stem or damper linkage wear on some systems, or
- You have systems that are difficult to restart if they are shut down; perhaps you have even disabled schedules in some systems because of this.
Once you start to gain a better picture of what is really going on, before jumping in and starting the loop tuning process, you may want to ask yourself a few other questions.
[Return to Contents]
Should the Control Loop in Question Be a PI or PID Loop or would a P only Loop be Just Fine?
The figure below compares the space temperature stability for a physics lab that was served by a Variable Refrigeration Flow (VRF) fan coil unit controlled by a PI DDC control loop (left image) with a similar lab that was served by a chilled water fan coil unit controlled by a proportional (P only) pneumatic thermostat (right image).

Both labs were lightly loaded at the time.
For the lab served by the VRF unit, notice how over the course of an hour and 15 minutes, the space temperature drifts up about 2°F and then is driven back down 2°F in 10 minutes.[viii]
Raising the set point simply changed the 2°F span over-which the cycle occurred. This cycle repeated hour after hour and was perceived by the occupant of the space as being very uncomfortable.
In contrast, for the nearby, similar lab that was served by a fan coil unit with chilled and hot water coils in it, as the load changed, the space temperature floated around fractions of a degree inside the proportional band of the thermostat. And while the actual space temperature never matched the set point for much of the time over the course of the day, it was very close to it and the occupant of the lab considered the space comfortable.[ix]
In this particular instance, the instability with the DDC process was related to an equipment sizing issue, a problem that loop tuning could not solve. More on that in the next section.
But, it is quite possible for a poorly implemented and tuned PI or PID loop to generate a similar pattern due to the added complexity of the process and the lack of understanding of the process and how to tune it.
So my point is that for many applications, in particular, zone temperature control, the simpler, proportional only process, properly set up, will likely provide a satisfactory, less complex, more persistent solution, as was the case for the lab with the pneumatic thermostat.
In turn, that may mean that the first step in your loop tuning process may be to make some of the loops that are currently PI or PID loops into P only or floating control loops.[x]
[Return to Contents]
Does the Precision Gained by PI and PID Matter?
I discovered PID because I finally realized that by nature, there would be proportional error in a P only process and I did not want the error because it represented an unnecessary reheat load (the details are in the PID paper I referenced previously).
Not all control processes are like that. The zone temperature control example discussed above is an example.
Control loops are are being reset by other parameters can be another. As long as the process is stable, in some ways, if properly implemented, the reset schedule will find the appropriate set point, including consideration of any proportional error that may be present.
[Return to Contents]
Can the Control Loops be Tuned Successfully?
There is only so much that a control process can do.
For instance, if extreme conditions place a load on a central plant that exceeds the capacity of the equipment in terms of being able to deliver the design supply temperatures and thus, the design zone conditions, then there is nothing that a control loop can do about that other than ask for everything the central plant can deliver and recover as quickly as possible once the extreme condition passes.
Another common example is related to how well (or not) the final control elements are sized. Few if any of the typical final control elements we deal with have linear characteristics. For instance:
- Valves and dampers need to be appropriately sized in the context of the loads served and the capabilities of the control system to provide a somewhat linear response.[xi]
- The shape of the impeller lines for fans and pumps are not linear, nor are the system operating curves.
For the system behind the example we used in this blog post, it turned out that the control valve was a line sized butterfly valve. As a general rule of thumb, for a modulating control valve to be able to deliver a semi-linear control response and achieve satisfactory control (i.e. is properly sized), then it will be at least one size smaller than the line that it is in;
- A variable load served by a 3 inch line will have a control valve that is 2-1/2 inches or smaller.
- A variable load served by a 1 inch line will have a control valve that is 3/4” or smaller
- Etc.
Because butterfly valves have such a low, wide open pressure drop, it is not out of the question that a properly sized butterfly valve will be 2 line sizes smaller that the line size for the load it is serving.
Similarly, the VRF system associated with the lab that was discussed previously was oversized and was not able to reduce capacity to the point that matched the load condition that existed in the lab most of the time. As a result, the most that the control process could do was to try to reduce capacity as quickly as possible when the cooling process started and then try to maintain the minimum capacity in an effort to address the load.
If the minimum capacity was still more than needed to balance the load, the control process’s only option was to over-cool the load or cycle off, wait a while, and try again.
Lags can also make a control process impossible to tune successfully. I discuss this in more detail in Lags, the Two Thirds Rule and the Big Bang – Part 5 in the paragraph titled “One Final Thought about Lags”. So I will refer you to that for more information on this particular subject.
The bottom line is that a control process may not be able to compensate for errors that are made in terms of sizing control valves, control dampers or equipment or for excessive lags that might be inherent to the configuration of the system or the nature of the hardware. Thus, the first step in tuning a loop for a system that is challenged by an issue like this might be to take the steps necessary to appropriately size the control valves or dampers, improve the turn-down capability of the system or equipment, or eliminate lags in the process.
[Return to Contents]
Derivative Gain Needs to be Used Carefully
The derivative gain associated with a PID control loop can be a “mixed bag” and needs to be used carefully.
On the one hand, if you get it right,
- It will reduce the swing you see in the process variable when you upset the system, and
- It will reduce the settling time required to become stable at set point with no error.
On the other hand, if you get it wrong:
- It can make a bad situation worse because by design, it responds to the rate of change in proportional error.
- It does this causing the output of the control process react even more quickly than it otherwise would and may make the system even more unstable.
Generally speaking, I (and may other folks whom I respect quite a bit) do not use derivative gain unless I really think it is necessary; perhaps to minimize the overshoot on start-up or improve the settling time for a large variable flow system. And even then, I am a bit (comfortably) nervous about doing it.
[Return to Contents]
There Are Multiple Successful Solutions to Many Loop Tuning Problems
The quarter decay ration I mentioned at the beginning if this post is a general indication of how well a a PI or PID process is tuned. In a real application, there are some practical considerations that come up as illustrated below.

In other words, for example, for a VAV AHU, you want the response to an upset to not trip out the static safety switch on the first overshoot. And you probably would like to see the process variable stabilize at the set point in 5 to 10 minutes or less.
When you start playing with loop tuning, you will discover that there may be a number of combinations of proportional, integral, and (if you use it) derivative gains that will give you a satisfactory result in terms of minimizing the overshoot and settling time after an upset. I realize this one day when, at the end of 4 or so hours, it dawned on me that the parameters I had used in my initial effort, based on the closed loop test method had actually worked just fine.
Every thing else I had tried since then had also worked (no safeties tripped and a reasonable settling time); the different settings had simply produced a different response pattern. But at that point, while feeling a sense of intellectual satisfaction, I was about 3 hours behind on what I needed to get done that day.
[Return to Contents]
Once May Not Be Enough
Even if it turns out that your loops had been tuned at one point, it wise to check them occasionally because things that affect the tuning parameters change in our systems over time;
- Linkage wears,
- Heat transfer characteristics change,
- Occupancy patterns change,
- Etc.
For new construction projects, I often tell people that we really may not have the building completely tuned until after about a year because it will take that long to cycle through the seasons and all the variations they bring.
That is one of the reasons most commissioning processes include peak season and swing season testing. Loops that seemed to work just fine during the fall swing season may be unstable when the peak heating season hits and will need to be retuned.
When spring rolls around some of the loops may still exhibit some instability and will need attention then too. And of course, the peak cooling system will push things to a place that they have not been to before potentially triggering a few more loop tuning problems to be addressed.
Ideally, by the end of the year, you will have found loop tuning solutions that work for all of the seasons. But you still will probably want to spot check your loops, especially PI and PID loops because wear and tear can change the system characteristics enough to trigger instability again. Spot checks are also warranted when operating patters change or after equipment repairs or upgrades.

 David Sellers
Senior Engineer – Facility Dynamics Engineering Visit Our Commissioning Resources Website at http://www.av8rdas.com/
[i] My focus here is on aliasing and its impact on a PI (Proportional plus Integral) por PID (Proportional plus Integral plus Derivative) loop tuning process so I am assuming that the folks reading this are familiar with P, PI, and PID control. But if you aren’t you may find the PID Resources page on our Cx Resources web site to be helpful, especially the ICEBO paper that is shared there on the topic.
[ii] The response of the system to a start-up is also a way to observe this. You could even say that a system that is operating on a schedule is testing its control systems for an appropriate response every time it starts up. In fact, if you are trying to get a general sense of how well a building is tuned, one thing you can do is observe how well (or not) it responds to starting from a dead stop.
Even if the trends are not fast enough to catch the waveform, if the systems are not well tuned, you will likely observe a lot of instability, potentially including processes that take a very long time or maybe even never stabilize at set point. In some instances, you may even find that the system has a hard time coming on line because the swings in parameters like temperature or pressure are so large that they trip the system safety switches.
In fact, if you ask a construction team or operating team if its O.K. to shut everything down and then start it up again to observe the response and they immediately object to doing it, perhaps even refuse to do it, then you probably should not proceed with your test because you may find out something the hard way that they already have discovered the hard way.
But I would postulate that in a case like this, your test actually was successful, even though you did not run it. That is because you discovered that the systems are challenging to bring on line if they shut down and thus, you may want to try to work with the team to understand why and correct it.
At some point, Mother Nature will run that test for you in the form of a power outage. If you take the time and effort to understand the problems and correct them, the team will be in a much better position to recover from Mother Nature’s test when it inevitably happens.
[iii] This image is taken from a series of articles Control Engineering published in the early 1980’s about PID. You can download a copy of them from the PID resources page on the Cx Resources website.
[iv] If you want to learn more about loop tuning, you will find a lot of information about it in the Control Engineering PID article series I mention in the footnote above, including a copy of Optimum Settings for Automatic Controllers, the original paper on the subject by John Siegler and Nathan Nichols. David St. Clair’s book Controller Tuning and Control Loop Performance is also a resource well worth the money and is how I learned most of what I know, along with field experience.
[v] Up until now, I have been using screen shots from the system we were working with. But moving forward, I am going to use the trend data that was sent me after our session. I loaded into Excel so that I can highlight and compare a number of things. So, even though the presentation will look different from the original black screen with a yellow ling in the image at the start of the post, the data is the exported data from that system.
[vi] The system has reached its natural frequency at the point where it starts to cycle at a steady frequency with a consistent magnitude at the peaks and valleys rather than displaying:
- No cycling, or
- A quarter decay ratio, or
- Cycling with an increasing magnitude for each half cycle at the peaks and valleys (a.k.a dynamic instability).
[vii] For this system, we did not actually have flow data so I am creating a “what if” scenario here to illustrate a point.
[viii] The details of the algorithm behind this are not totally exposed in the vendor documentation, but trend data that we collected along with the space temperature line shown above suggests that the root cause of the problem was not a loop tuning issue, rather it was a capacity issue.

More specifically, the system would:
- Initiate cooling when the space temperature rose about 1/2°F above setpoint, then
- Attempt to modulate cooling to try to match the load, and then
- When it could not match the load, run at minimum capacity, and then
- When the space continued to overcool, cycle off, and then
- Remain off for a predetermined period of time before trying again.
[ix] To understand what is being illustrated here, it is important to realize that for a proportional control process, there will always be a difference – proportional error – between the set point and the control point other than at the condition at which the device was calibrated. In this example, the thermostat had been calibrated so that when the set point matched the space temperature, the output was at the midpoint (9 psi) of the 3-15 psi span.
The pneumatic signal was connected to both a normally open hot water valve and a normally closed chilled water valve. The spring ranges had been selected so that the hot water valve would be fully open at or below 3 psi and driven closed with an 8 psi signal.
The chilled water valve would not begin to open until the signal reached 10 psi and would be fully open when the signal reached or exceeded 15 psi.
When the temperature matched the set point, neither valve would be open.
The thermostat was was direct acting, which means it’s output would increase as the difference between the space temperature and its set point increased. With the throttling range set for 1.5°F, and a set point of 71.25°F, the result was that the temperature would need to reach approximately 71.4°F before chilled water would be used and would need to reach approximately 72°F to get the chilled water valve fully open, as illustrated below.

A similar deviation from set point the other way would be required to cause the unit to start to use hot water.
For the period associated with the data, you can see that conditions were such that the system initially the system only need a small amount of chilled water. Then, for a while, it did not need any chilled water. Later in the sample period, the loads increased to the point where the space temperature drifted far enough above set point to cause the system to opened the chilled water valve about 50% before the gains came into balance with the cooling capacity provided by the chilled water,
During the entire window of time, the space temperature was held with-in 2/3°F of set point or less. Because the variation in temperature was modest and gradual and the space generally seemed at about the temperature the occupant had set the thermostat for, they felt comfortable. This was not the case for the VRF system where the space seemed to swing erratically by 2°F every hour or so.
[x] Floating control is a process that simply targets keeping a process inside a “window”. If the process strays outside the window, then corrections are made to drive it back into the window. But if the process is inside the window, no adjustments are made.
[xi] For more information about valve and damper sizing see the Honeywell Gray Manual and the MCC Powers Valve and Damper Sizing Engineering Bulletins.
 To try it out, follow this link. When you get there, you should see something like this in your web browser.
 This post is about how to apply a system diagram rather than how to draw one. If you are wondering what a system diagram is and how to draw one, here are some resources that should help you out with that.

 The system configuration is called variable flow, primary/secondary. For more information regarding how this system configuration works as well as other configurations like constant flow and variable flow primary only, visit this location – http://tinyurl.com/VariabeFlow.
 If you wanted to see the full derivation of that relationship, you will find it at this link, which derives it for a mixed air plenum. But the concept is virtually identical for a tee in a piping network.
 One of the interesting features of this system is the self contained thermostatic valve used to regulate the entering water temperature to the boiler, illustrated in the image to the left. The boiler is a non-condensing boiler, thus, it needs to operate with an entering water temperature that is above the dew point temperature of the flue gasses (in the range of 130-140°F for a natural gas fired process).
 The operating principle behind this particular valve involves the change in volume that occurs when wax changes phase from a solid to a liquid. If you have ever made candles you probably have noticed how, as the candle cools, the top surface of the candle becomes concave due to this phenomenon.
  You can control the temperature at which the wax changes phase based on the type of wax you are using and additives that are mixed with it. The manufacturer of this valve has a nice video that illustrates how the valve works located on their website at this link (the QR code above should also take you there).


 David Sellers


 The first video and related resources
 The second video